weebly statistics
Home About Links Contacts Show Show
Amanda

The Top 10 Things NOT to Look for in Buying a High Chair

by Amanda on May 18, 2008
category: 0 – 1 year (baby),1 – 3 year (toddler),Product Reviews

highchair.jpg1. A five-point harness strap system that won’t tighten small enough to keep your baby from squirming out and climbing on to the tray.

2. A buckle that hurts your hands when you squeeze the sides to open it.

3. A comfy and cushy seat cover that is Dry Clean Only and requires you to hand scrub every dried spot of sweet potato.

4. A space large enough that your baby can recline and not be able to reach on top of the tray.

5. A tray that is twice the size of your kitchen sink and spills water on your floor every time you clean it.

6. A chair that takes up at least 3 square feet of your limited kitchen floor space.

7. Corners and crevices that attract every crumb and piece of bread to be eaten by baby at the next meal.

8. A seat cover that is difficult to remove and place back in with buckles too large to squeeze through the tiny slots in the cover.

9. A tray with shallow sides that allows your baby to drop food on the floor when they were trying to pick up the food off the tray.

10. An aesthetically pleasing seat that matches your kitchen but makes feeding and cleaning a dreaded experience.

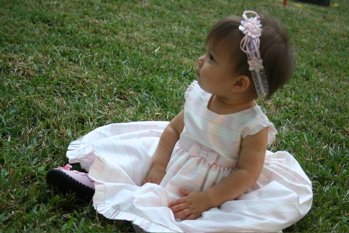
Last week I left my daughter alone strapped in her high chair for a minute. When I came around the corner I saw her sitting on top of her tray. I have wanted a new booster seat and this was the straw that broke the camel’s back for me. I purchased a Safety 1st Recline and Grow 5-Stage Feeding Seat and I love it!

boosterseat.jpgEven though it doesn’t have a 5-point harness it is small enough to keep Ace in her seat. Also, I need to be careful to pick Ace up as soon I pull out the tray, because she leans forward when I pull the tray out. The new booster seat is so easy to keep clean.

I had no clue what to look for when I registered for a high chair. I assumed that all high chairs were the same and I picked the one that matched closest to my kitchen colors. Boy was I wrong!

Here are some high chair buying tips from Consumer Reports.

Do you use a high chair or booster seat? Which one do you use? How would you advise a new mom that is shopping for a high chair?

McKenna

Tube Feeding Your Child

My daughter, Darah was tube fed for the first two years of her life. Darah's OG TubeMost people had absolutely no idea what her feeding tube was and I got a lot of stares or quick “look aways” and a lot of questions about what those tubes were for. Darah was born with a very serious heart defect. This heart defect made her incredibly tired. In addition to her heart defect, she also has low muscle tone, because she had Down syndrome. The combination of low muscle tone and her exhaustion from her heart defect made her suck/swallow/breathe coordination impossible. From day one, we had to sustain her life by using a feeding tube.

The first feeding tube we used was an Oral Gastric (OG) tube and after about a month, Darah graduated to a Naso Gastric (NG) tube. The OG tube is a feeding tube that is inserted in the mouth, down the esophagus, into the stomach. The NG tube is inserted through the nostril, down the esophagus, and into the stomach. With a syringe (or pump), we were able to pour my breastmilk or formula into Darah’s stomach. Darah’s open heart surgery was not until she was three months old, so she received all of her nourishment through her feeding tube. The NG Tube made her very sensitive to anything coming near her face or mouth. Darah's NG TubeThis oral aversion led to a surgically placed feeding tube when she was five months old. This G-tube allowed us to give Darah her necessary calories and fluids and attempt to work on feeding. She started off with a Peg Tube, which is a feeding tube in the tummy that has a permanent extension tube attached to it. After that healed, 6 weeks later, we switched that out for a Mic-key button. The best way to describe this is it’s just like a beach ball plug. It snaps shut when you’re not using it, and when you’re ready to access it you can unplug it and attach a tube extension to it.

Fast forward to Darah at 16 months old. She had made very minimal progrDarah's Peg Tubeess with oral feedings and we decided to attend a six-week inpatient, intensive feeding program in Dallas, Texas. This program (Our Children’s House at Baylor) was the best thing we ever did. When we completed our 6 week stay, Darah was taking all of her caloric needs orally. She still struggled with drinking, however she was taking all of her fluids orally by her second birthday. Her feeding tube was removed a few days before her second birthday! She now loves to eat and drink! (I never thought I’d be able to say that!)

If you are dealing with a feeding tube, or severe feeding issues, I strongly encourage you to do a few things:

  • Find support from other moms who have been there/done that! I found this great yahoo group that was always there for my questions and concerns.
  • Don’t go it alone! Ask close friends or family to learn how to feed your child. By training a few people, you can get those much needed breaks from the whole feeding process. Most people will be happy to learn and to help.
  • Ask questions! If you aren’t comfortable with your doctor’s advice, get a second opinion. G-tube surgeries are done a lot, however it is still major surgery. So, ask questions! Remember that this is YOUR baby! It’s so easy to forget that when you have a child with multiple health issues.
  • Get lots of “extras!” Every time you’re in the hospital or doctor’s office, make sure you pick up a spare g-tube, extensions, and syringes!Darah's G-tube button
  • Find an EXCELLENT Speech Pathologist and Occupational Therapist. Don’t be afraid to “shop around.” Find a therapist who is a researcher and not afraid to think outside the box.
  • Don’t be easily offended. A lot of people stared at Darah’s tube because they just didn’t know what it was. If anyone asked me about it, I happily educated them on it. People don’t mean to offend when they stare (or quickly look away), they just don’t know what it is and don’t know how to respond.

I love answering questions about feeding tubes and would love for anyone to take the opportunity to share their tube-feeding story, experience, or question!

Here’s some more resources for you:

Tummy Tunnels

New Visions-Children with Feeding Tubes

Kids with Tubes

Little Bites Support Group

Amanda

20 Keys to a Successful First Birthday Party

by Amanda on May 12, 2008
category: 0 – 1 year (baby),Fun time & Toys,Inspiration

I used wonder why first birthday parties were such a big deal. The party is really for the parents, right? Now I understand that the first birthday party is a celebration of life bringing friends and family together. The party marks a milestone of surviving the difficult first year for both the little one and the parents.

Our celebration turned out wonderful. I love party planning and helping everyone have a great time. Here’s a few keys that I’ve found that will help make your first (or any) birthday party a success:

  • 1. Consider your child’s nap times when scheduling the time of the party. Plan the party around your child’s nap times so they will be happy when it is time to start. We started our party at 4:00 p.m. This allowed Ace to get two naps in during the day and all the kids that attended could eat dinner at the party and be home by bedtime.
  • sat-may-3-2008-copy.jpg
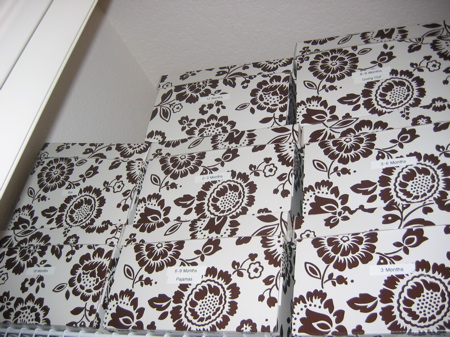
2. Every first birthday party must have cake! The theme of our party was flowers, so my husband made two cakes in the shape of a flower. We bought a cake flower pan at Hobby Lobby and used boxed cake mix. We didn’t have time to make a special small cake for Ace so I just cut off one of the petals for her to dig into. No one cared that she didn’t have a special cake to herself.
  • 3. Play fun party music! The key is not to play what you like, but what will get the party going. Just because I like alternative-folk music doesn’t mean that everyone else likes it. Nor does it make for a fun party atmosphere. We hooked up my husband’s laptop to a receiver which connected to a pair of large speakers and played music from Internet radio through iTunes. We placed the speakers outside an open window in the backyard so it could be heard both inside and out.
  • 4. Have activities for all ages. We set out toys inside the house for the little ones. In the backyard we had horseshoes and a game called Washers for older kids and adults. All these games were borrowed so we didn’t have to spend a dime!

sat-may-3-2008_1.jpg

  • 5. If you are serving food have it ready near the beginning of the party. This is one of my personal pet peeves. If I know that a party is serving food I usually arrive hungry and ready to eat. I don’t want to wait an hour while you fire up the grill. Serving food at the beginning of the party usually makes everyone happy.
  • 6. Have someone else take pictures for you. I am so thankful for my friend Kara who got some amazing shots. I was free to mingle and take care of Ace while she digitally recorded the special day for us.

sat-may-3-2008_3.jpg

  • 7. Have plenty of seating. I didn’t want my guests trying to cut their brisket served on a paper plate in their laps. I borrowed a couple of extra tables and chairs for the back yard. I covered them with plastic table clothes bought at the dollar store for 99 cents each.
  • 8. Clean your entire house the week prior. I know this may seem like a daunting task, but it is worth it. I am much more calm and clear-minded when my house is clean. I never stressed if a guest wandered into a room with a closed door. A few guests used the guest bedroom to change and I was thankful that I had picked up that room.
  • 9. Cut the cake at least halfway or two-thirds into the party so people can feel free to leave. Everyone wants to see the little one take their first bite of pure sugar cake, so don’t make them wait too long!
  • 10. Open presents at the end of the party. Opening presents can take a long time, so it is best to do it after the cake. The people who wanted to see the gifts stayed and had a great time.
  • 11. Make a slideshow of photos to play on the T.V. I put a bunch of photos on my ipod and hooked my ipod to the T.V. You can also make a video of photos and burn it to a DVD. Or you could connect your computer to the television and play a slide show. Many people wandered into the living room and watched the entire show. The party guests enjoyed seeing themselves in the slideshow. It is a great way to celebrate your little one’s first year of life.
  • 12. Enlist help to set up before the party. You cannot set up all by yourself. Have a friend or relative come early and help. I am seriously thankful for the folks that helped me.
  • 13. Carefully plan the food set up and flow of traffic before the party. Spending a few minutes to think about where the plates, food, and drinks go will help keep people moving through the kitchen and clear any traffic jams.
  • 14. Place cheerios and goldfish out for the little ones. They will appreciate the snack just for them. The cheerios were a big hit at our party.
  • 15. Have the washtub and a back up outfit ready. Ace got a quick bath to rinse off the icing and she got to wear two super cute dresses to her party. It was handy knowing I had a back up in case the first got covered in cake.

sat-may-3-2008.jpg

  • 16. Don’t make people feel obligated to stay more than two hours. I really like to respect people’s time and they appreciate it too. If people want to stay they will stay, but I think a party is much more fun if it doesn’t drag out the whole day.
  • 17. If you have a party at lunchtime or dinner then you should serve food. If you are just going to serve cake and snacks have it mid-morning or mid-afternoon. I think guests will be hungry if you have the party around a usual meal time.
  • 18. Save money and time by serving lemonade and tea made from instant powder. I spent about fifteen bucks for the drinks and cups for fifty people. It was a lot cheaper than serving sodas! Honestly, the instant tea wasn’t that bad.
  • 19. Don’t stress if everything isn’t perfect or you forgot something. The party will go on and everything works out. The focus is on your family and the new little one, not that you ran out of cups.
  • 20. Be in the moment. Once the party is going – enjoy it! Don’t forget to eat, mingle, and be proud of your accomplishment – your family has survived the first year!

Did you have a large first birthday celebration? How did it go? Do you have party pet peeves or any rules that you usually follow when you host? Do you have any money saving tips for parties?

Amanda

A Peak Into My Nursery

by Amanda on May 4, 2008
category: 0 – 1 year (baby),Pregnancy,Product Reviews

My little girl celebrated her first birthday with a party at our house this weekend. So I decided I should probably finish putting her nursery together, you know, so I can show it off to all my family and friends. Luckily Ace can’t talk yet and complain about my wall color choice or beg for Dora posters. The nursery still isn’t complete. There are two blue v-shaped floating shelves that I am waiting for my husband to hang.

We started the nursery when I was pregnant. We didn’t find out the gender so we wanted a gender-neutral room. Also, we are planning a second child some time soon and I didn’t want to re-theme the same room for the second one. I am way too cheap frugal that way. We chose a light lime/apple color for walls. We matched the wall paint to a pair crib sheets we picked out. Then anchored the room with white furniture and blue and orange accents.

The Room

dresserwall.JPG

* Diaper Champ! love it. Gift from baby shower
* White Dresser from Ikea – $69.99
* Changing pad from a baby shower gift.
* Oatmeal laundry basket – Gift from baby shower
* Dump truck from my niece.
* Orange hanging storage unit from Ikea – $4.99. This is a great place to store all those bazillion stuffed animals that we receive as gifts. Really, how many stuffed animals does a girl need?
* Dimmer on the wall from Lowe’s – $20
* Art by me.

cribwall.JPG

* Crib from Babies R’ Us – A gift from my in-laws and Uncle at my baby shower!
* Sage Gerber Crib Sheet from Babies R’ Us – $7.99
* White Dust Ruffle from Babies R’ Us – $17.99
* Art by me.

curtains.JPG

* Do you see the strange blue things in the corner? Those are the two blue wall shelves from Ikea that need to be hung – $6.99 each.
* Hedda Multicolor curtains from Ikea – $29.99
* Bright orange sheers from Ikea – $14.99 for a pack of two
* Curtain hardware from Ikea – $3.99 for rod – $1.49 for hardware.
* Marley the monkey and stroller were gifts.

closetwall.JPG

* White bookshelf is a hand-me-down from my friend, Barb.
* Blue storage bins from Ikea – $1.49 each.
* Books, frame, and stuffed animals were gifts.

The Closet

closetdoor.JPGclosetboxes.JPG

* Large storage boxes from Ikea – $6 for pack for 2.
* Small boxes for clothes (notice: they are all labeled!) – $3.99 for 2.

Lighting

lighting1.jpg

lighting2.JPG

* Magnesium Spotlight System from Ikea – $69.99. I saw a picture of a nursery with cool track lighting and found this alternative. They were really easy to install. We also added a dimmer. I also like how the S-shape mimics the pattern in the curtains.

Art

artcircles.JPG

artalphabet.JPG

* Canvases were a total of $35. I can’t remember. Brushes – $3. I used leftover wall paint for the paint. I am not an artist and this was my first attempt. I used to see abstract pieces of art and think, “I could do that!” Now I know why art costs so much. I didn’t have the right paint and my skills simply aren’t the best. I did these really quickly last week.

* The circle art is inspired by Essence-Chocolate and Essence-Blue from art.com.

* The alphabet piece highlights my daughter’s initials in orange. I remember seeing a website where they would create an artwork piece with your child’s name highlighted in the alphabet. It just worked out the A,C, and E are the beginning for me.

Putting together Ace’s nursery was incredibly fun for me. Can you tell I love Ikea? Did you put a nursery together for your little one? Do you kid’s room have a color palette or theme?

We’d love to see your nursery or kid’s room – post a picture or video to your blog or to flickr or YouTube (etc) and leave a link in comments below!

McKenna

Decorating with Chalkboard Paint!

dsc00676.JPG
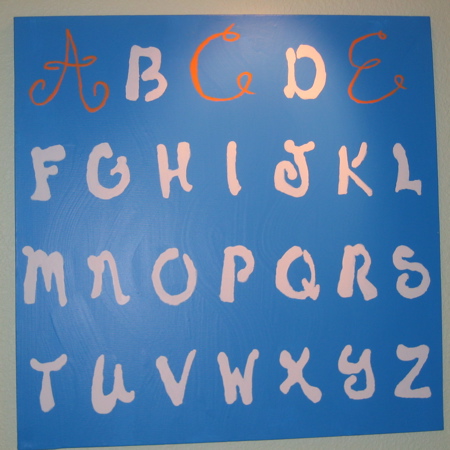
Connor’s room has these huge sliding closet doors. They take up nearly a whole wall in his room. When I decided to paint his room, I didn’t know what to do about the doors. Did I paint them the same blue that the walls were painted? Did I paint them in a complimentary color to make them more fun? I just wasn’t happy with any of my ideas. I posted my dilemma on a forum and got the great idea of using chalkboard paint

I headed out to Lowe’s and bought a quart of chalkboard paint for $12.00 and went to work. The paint was very oily. I used a brush instead of a roller and painted three coats letting them dry in between. Erasing them requires a wet washcloth, which isn’t too big of a deal. Everyone loves Connor’s chalkboard closet doors. I do have parents ask if this has encouraged my kids to write on walls, and it hasn’t. Both of them know to only write on the closet doors. Writing on regular walls with chalk wouldn’t be as rewarding, anyway! Besides, I’d much rather clean chalk off of my walls than marker or crayon.

What fun decorating ideas do you have for kids rooms?

« Previous PageNext Page »